
We all know that broccoli is a super food, but most of us don’t eat enough of it. Some people find it hard to prepare it or don’t like the taste. There’s a more nutrient dense version of broccoli that you may not have heard of.
We have explored how to grow microgreens from plants such as cilantro, radish, leeks, and cauliflower. So why not micro broccoli?
Micro broccoli also referred to as broccoli microgreens, is easy to grow and only takes about 2 weeks. The best part is that it has more nutritional value and health benefits than mature broccoli, and you harvest it a few days after germination. Micro broccoli adds a crunchy texture to your salads and any meals that you would eat with broccoli.
In this article, you’ll discover how to grow micro broccoli step by step at home. We will also go over the health benefits and why you should consider adding micro broccoli to your diet.
What Is Micro Broccoli?
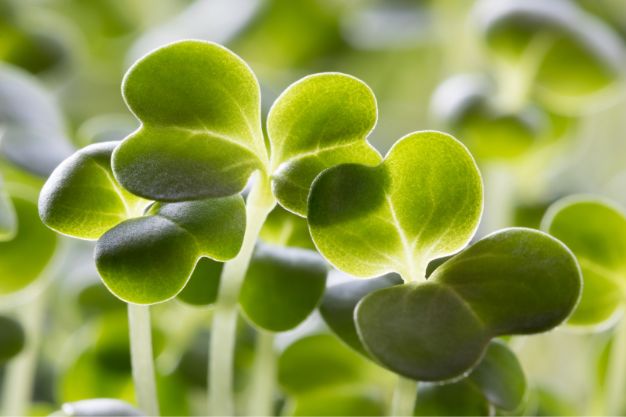
Broccoli microgreens are the young version of broccoli, which is harvested a few days after germination when the first true leaves appear, usually 10 to 14 days after planting.
At this stage, the plant contains more nutrients, for example, a higher content of sulforaphane than mature broccoli. So, is micro broccoli the same as broccoli sprouts? The answer is no. Broccoli microgreens are not the same as broccoli sprouts.
Broccoli sprouts are harvested right after the seeds germinate (2-7 days) and don’t have leaves, while micro broccoli is harvested after the first true leaves have formed, which is about 7-14 days after germination. Another difference is that micro broccoli uses soil as the growth medium, while for sprouts, you only need a jar and water.
Why Is Micro Broccoli Good For You?
Before we go into the health benefits of broccoli microgreens, please note that you should always consult a healthcare professional before making any dietary decisions based on the information in this article.
Broccoli microgreens contain essential nutrients such as sulforaphane, which has anti cancer, antidiabetic, and anti aging properties.
According to research, sulforaphane reduces the number and sizes of cancer cells and prevents them from multiplying. The nutrient also triggers the release of antioxidants that neutralize elements that cause cancer. Sulforaphane also reduces inflammation of blood vessels, which prevents heart disease.
Micro broccoli is also rich in vitamins A, B, C, E and K and minerals such as iron, potassium, and magnesium, which are essential for your health.
How to Grow Micro Broccoli
You can buy broccoli microgreens at your grocery stores or on Amazon, but why not grow them at home? Now that you understand the health benefits of broccoli microgreens here is a step by step guide to grow micro broccoli at home.
As an Amazon Associate we earn from qualifying purchases. Some links on this site may direct you to Amazon where we earn a small commission from each sale at no extra cost to you.
Assemble the materials
The first step is to get all the supplies that you need:
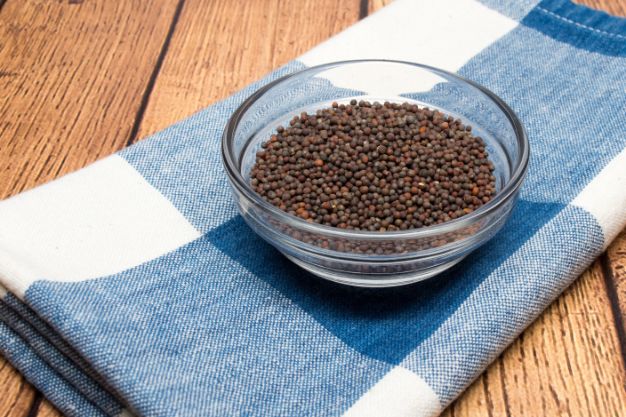
- Broccoli seeds: choose organic broccoli seeds that can be grown into microgreens.
2. Growing medium: the best growing medium for micro broccoli is an organic potting mix.

You may be asking, can you grow broccoli microgreens without soil? Although potting mix is the best growth medium, you can also use alternatives such as hydroponics, coconut coir, or biodegradable mats. It is best to choose a medium that can give better control of the moisture levels and give adequate nutrients for better yield.
3. Containers: get 2 shallow trays that are 1-2 inches deep. One of them should have drainage holes in the bottom, and the other one should not and should be slightly larger for bottom watering. You can also use take out containers for a start.

4. Spray bottle: to water the microgreens when you plant them.

Buy a spray bottle from Amazon.
5. Grow light: you can use sunlight indoors in a sunny spot. However, a grow light helps you control how much light you give to the plants and helps the plants grow uniformly.

Buy grow lights for indoor plants on Amazon.
Planting
Fill the container or tray with organic potting mix just below the rim. Use your hand to level and gently press it down.
Spray the soil with water from the spray bottle two times. Then, sprinkle the seeds using a shaker bottle. Ensure that the seeds are evenly spread to avoid overlapping or patches of soil with no seeds.
Don’t add too many seeds, as it can cause them to grow too densely and make weak plants with no airflow, which increases the risk of rot. Spray the seeds with water to increase the rate of germination, but don’t overwater them.
Germination
Cover the container or tray to increase humidity and keep the seeds in darkness to facilitate germination. Leave the seeds untouched for 3-4 days until the seeds germinate.
Broccoli microgreens don’t need much weight to have strong plants, unlike radish or kale microgreens, so you don’t have to add weight over the lid.
Growing
After three days, remove the cover and check if the seeds have sprouted. If the plant already has small leaves, remove the cover and transfer the tray to a sunny spot or under a grow light. If the leaves have not formed, cover for one more day or two.
At this stage, the plant needs light for about 6-8 hours every day. Ensure that you give a constant supply of light for uniform exposure and growth.
Water the plants from the roots using a bottom tray every other day. Avoid overwatering as it can cause rooting, molds or mildew. The leaves will be pale at first but will turn green a few days after exposure to light.
Harvesting
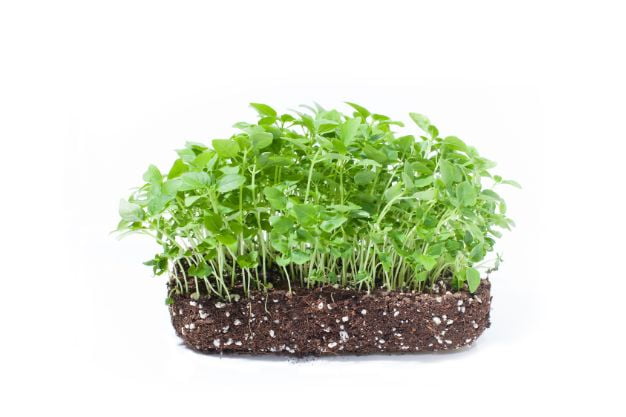
Broccoli microgreens are ready for harvest about 7-14 days after planting them. At this time, they are 2-3 inches tall, and the first leaves (cotyledon) have formed and have a rich green color. Avoid watering the plants 12 hours before harvesting to ensure that they are dry and last longer.
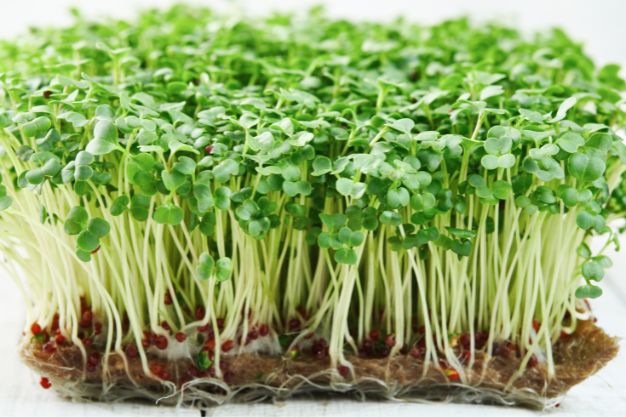
Snip them off just above the surface of the soil using a sharp knife or kitchen scissors. Store the extra in airtight bags or containers in the refrigerator for 7-9 days. Unlike leek microgreens, micro broccoli doesn’t regrow after harvesting.
Enjoy the crunchy broccoli microgreens raw and fresh in your salads, smoothies or sandwiches or add to soups and stews.
Final Thoughts
Micro broccoli is one of the easier microgreens to grow at home for beginners. They grow quickly and are ready to harvest in as little as seven days after planting. They have numerous health benefits, and you should consider adding them to your diet.
FAQs
- Can you eat micro broccoli?
Micro broccoli is considered a superfood because it is packed with beneficial nutrients. You can eat micro broccoli the same way you eat mature broccoli and add it to any dish.
- Is micro broccoli as healthy as regular broccoli?
Broccoli microgreens have a high nutritional value compared to mature broccoli since they are harvested at the growing stages when the plant has a denser nutrient content.
- How do you eat micro broccoli?
Add micro broccoli to your salads, smoothies, scrambled eggs, sandwiches
- What are the nutrients in micro broccoli?
Micro broccoli is rich in vitamins A, C, E, B and K and minerals such as iron, magnesium, zinc and phosphorus. It also contains sulforaphane, which is beneficial for your health.
- What does micro broccoli taste like?
Broccoli microgreens contain sulforaphane, which makes them have a slightly bitter taste, but it is a great addition to salads, sandwiches or stews because it balances the flavor.


Comments (2)
How to Grow Leek Microgreens Fast and Easy at Home - City Green Thumbsays:
November 10, 2023 at 3:24 pm[…] How to Grow Micro Broccoli Indoors Fast and Easy […]
How to Grow Kale Microgreens Indoors Fast and Easy - City Green Thumbsays:
November 11, 2023 at 1:02 pm[…] How to Grow Micro Broccoli Indoors Fast and Easy […]