
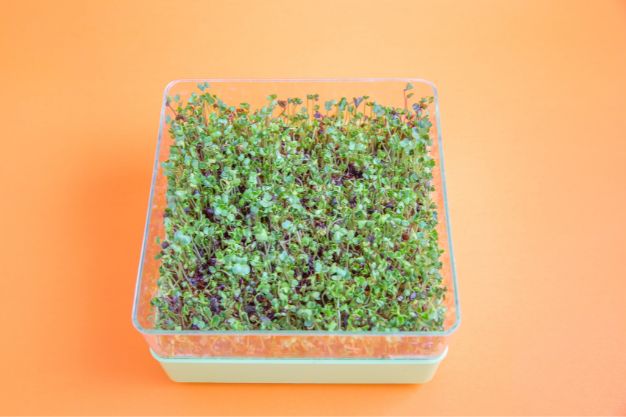
Growing kale microgreens is easy and fast at home, even if you’re a beginner. Kale is one of the healthiest foods in the world.
And just like other plants, the microgreen version is more nutritious than the mature kale and takes a short time to grow. Furthermore, kale microgreens are palatable and taste less bitter than leafy mature kale leaves.
This article shares how to grow kale microgreens with a step-by-step process from choosing the seeds, planting, how to care for them, and when to harvest. We will also cover some of the challenges you may encounter at home and some of the health benefits of kale microgreens.
Kale Microgreens Nutrition
Kale microgreens contain vitamins A, C, E, B6, K, and E and minerals such as iron, calcium, potassium, and magnesium. They also contain polyphenols and antioxidants, which reduce inflammation and boost the immune system.
As an Amazon Associate we earn from qualifying purchases. Some links on this site may direct you to Amazon where we earn a small commission from each sale at no extra cost to you.
What You Need To Grow Kale Microgreens
- Kale Seeds: You can buy seeds from grocery shops in New York or on Amazon. There are different varieties, such as Red Russian kale, blue curled kale, White Russian kale, or dwarf Serbian.

The red Russian kale produces pink and violet stems and is more costly than other varieties, but it is the best.
2. Growing medium: use a potting mix that contains coconut coir for optimum results. You can also use fiber mats such as bamboo or coco mats.

However, kale microgreens grow better in soil (potting mix).
3. Containers: You need a planting tray with a drainage hole to let out excess water and also allow water in if using the bottom watering. You also need a planting tray with no drainage holes or a plastic lid to cover the plants as they germinate. The planting tray that has no hole will also hold water and allow the bottom watering.

Choose small sized trays for a start since they are easier to manage. You just need about 2 tablespoons of kale seeds per tray. Using fewer seeds gives healthier microgreens, so don’t plant too many seeds at the same time.
4. Weights: Get a 5 pound weight or a rock to keep the lid in place during the blackout stage to keep the lid in place.
5. Spray bottle: to moisten the seeds and soil before planting kale seeds.
6. Sharp knife or shears for harvesting.
How To Grow Kale Microgreens Step By Step
Now that you’ve gathered all the requirements, it is time to plant the seeds.
Fill the planting tray that has drainage holes with the potting mix. Press down the soil and spread with your fingers to have an even surface. A smooth surface makes it easy to spread the seeds evenly.
Moisten the soil with water using a spray bottle about 3 times to get enough water to the soil. Don’t overwater since the seeds just need a little moisture and don’t need the soil to be wet all the way to the bottom. Too much humidity can cause mold formation, so only moisten the top half of the soil.
Planting the kale seeds
Now that the growing medium is smooth and moistened sprinkle the seeds evenly on the surface. You don’t need to soak the seeds first. Use a shaker bottle to spread the seeds, as it is easier than using a spoon or your fingers.
Spread the seeds however there is a gap, then use your fingers to move them around if there are more seeds in one place. Gently spray one more time with the spray bottle to make the seeds attach to the soil.
Now, cover the tray with a lid or another planting tray that does not have drainage holes and place a rock or weights to keep it in place. Covering the seeds blocks out the light and gives the right environment for the seeds to germinate.
Once the seeds sprout, they will push the lid up, grow strong, and force their roots to grow into the soil.
Germination
Kale microgreens need about 3-4 days to germinate while covered in darkness. You don’t need to do anything at this stage.
Avoid the temptation to uncover the lid to check the plant, as it may disturb the fragile roots of the microgreens. Some kale seeds may germinate in 2 days while others may germinate in 4 to 5 days, but don’t check them for the first three days.
Growing stage
After three days, it is safe to uncover the kale microgreens. Remove the weight and lid. You will notice they are yellow but don’t panic. They will turn green when exposed to light.
If the seedlings are small and look weak, cover them for one more day. Some seeds may take longer to germinate than others, depending on the growth conditions.
If the seedlings look strong, then it is time to take them out of the blackout and expose them to light. Use grow lights or LED lights of 20 watts and keep them turned on for 15 hours, about 6 inches above the microgreens.

Buy Barrina LED grow lights on Amazon.
Although you can grow the kale microgreens using sunlight, it will be more challenging since they will start leaning towards the window, so you will have to rotate the tray every other day. Yet, the plant needs more light to have color intensity, meaning darker green leaves.
By this time, the water you added when planting is exhausted, and the soil is dry. Use a spray bottle to add water to the plant. But avoid overwatering the microgreens to avoid the growth of molds or bacteria.
Water them before placing them under the light and continue every other day. Water from the bottom using the additional planting tray without holes or a watering tray to allow the plants to get water from the bottom to keep the plants healthy. It is wise to avoid watering from above.
Once you provide the light and moisture needs, the plant will continue growing until it is time for harvesting.
Harvesting
For most microgreens, you can start harvesting once the true leaves form, but for kale, you can keep them in the planting trays longer. Harvest a little at a time and determine when you think they taste better for you.
If you wish to keep them longer, keep watering them since they need more water as they grow. You may have to harvest them sooner when you use a shallow tray compared to when you use a deeper planting tray.
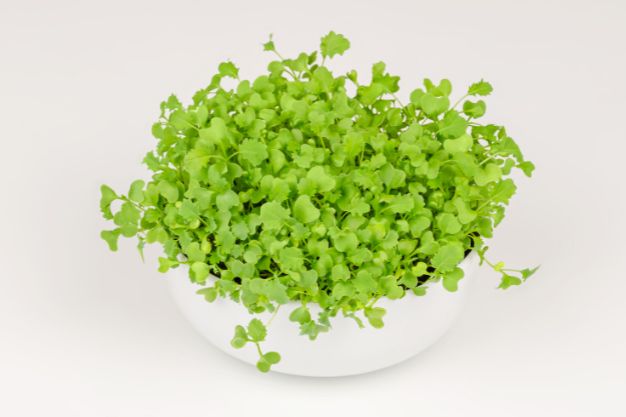
But the rule of thumb is they are ready to harvest within 8-12 days after planting, and they are 4 inches tall at this time. Use a sharp knife or scissors to harvest what you need for that day, and place the tray back to let the rest keep growing.
Final Thoughts
Growing kale Microgreen is fast and easy at home. The seeds germinate in just 3-4 days and are ready to harvest by day 8 after planting them. Give them sufficient light and water them regularly to provide the best conditions for their healthy growth. You can harvest them from day 12 and enjoy them in your salads, stews, and sandwiches. If you are ready to try out the goodness of kale microgreens, don’t hesitate to share the outcome in the comments section below.
FAQS
The microgreens are ready to harvest 8 -12 days after planting them. At this time, they are 3 to 4 inches tall.
Yes, kale microgreens are easy and fast to grow, whether in the soil or hydroponically.
The kale seeds take days to germinate. You can increase the rate by soaking the seeds before planting them.
They are less bitter than mature kale leafy greens and have a natural sweetness and mild flavor.
Soaking fastens the germination rate for microgreens. Soak kale seeds for 6 to 8 hours, then rinse and plant them in the growing trays.
When planting the seeds in a potting mix, you only need to water them once and cover them for three days until they sprout. Once the seeds germinate, water sparingly from the roots every other day.


Comments (3)
How to Grow Leek Microgreens Fast and Easy at Home - City Green Thumbsays:
November 9, 2023 at 8:30 pm[…] How to Grow Kale Microgreens Indoors Fast and Easy […]
How to Grow Cauliflower Microgreens Fast at Home - City Green Thumbsays:
November 13, 2023 at 4:28 pm[…] How to Grow Kale Microgreens Indoors Fast and Easy […]
Should You Buy Microgreens or Grow Them At Home? - City Green Thumbsays:
November 16, 2023 at 4:16 pm[…] Read more: How to Grow Kale Microgreens Indoors Fast and Easy […]